
How to Make Native Plant Scented Candles

Have you ever hiked past a California bay tree or a patch of yerba buena and thought, “I wish I could have this scent as a candle”? You can, and I’m going to show you how! My name is Annie, and this summer, I had the opportunity to be a part of Grassroots Ecology’s Summer Naturalist Internship. As part of this program, each intern completes an independent project, and I was inspired by California’s wide variety of fragrant plants to make and write a tutorial for custom scented candles. I hope that this tutorial will not only result in a unique candle for your home, but that it also inspires you to engage with and explore your local environment!
Responsible Foraging
Foraging for wild plants, including the California bay laurel leaves we’ll use in these candles, is a great way to engage with nature and learn more about your local ecosystems. However, it is important to take steps to keep yourself safe and avoid causing harm to the environment. Before you go out to gather materials for this project, here are some guidelines to follow in order to forage sustainably:
Leave enough of whatever you are collecting (in our case, leaves) for the remaining population to fully recover, and don’t take more than you will be able to use at one time.
Be 100% certain of your identification for anything you collect — this is crucial if you are planning to eat wild plants, but it’s also important if you are planning to use them in home goods, like these candles.
Make sure it is safe and legal to forage in your area. Avoid areas that are regularly treated with herbicides and pesticides, and do not forage on public land or others’ private property unless you have permission. The best way to make sure you are allowed to forage is to do so on your own property, or on a friend’s property that has given you permission.

Part 1: Making the Fragrance Oil
A homemade fragrance oil infused with real California plants is what makes these candles special. In this tutorial, I’ll be using leaves from the California bay laurel (Umbellularia californica), but feel free to experiment with other fragrant plants! You can also find ready-to-use fragrance oils for candles online or at a craft supply store.
You will need:
At least 1 cup of fresh California bay laurel leaves
Carrier oil — I used a light olive oil, but you can use another type, such as almond or grapeseed, as long as it has a neutral scent and is liquid at room temperature
A 4-ounce mason jar
A crock pot or other multi cooker with a slow cook setting
A dish towel
Cheesecloth or a coffee filter
Step 1. Clean your bay leaves by thoroughly rinsing with water and drying to remove debris. Then tear the cleaned leaves into small pieces.
Step 2. Fill your glass jar with the bay leaf pieces, leaving about a half inch of space from the top. Next, fill the jar with enough of your carrier oil to just cover the leaves.
Step 3. Place your jar in the slow cooker. If you’d like, you can line the bottom of the pot with a dish towel to keep the jar stable and prevent it from directly touching the heat source. Fill the slow cooker with water until the water level is about a half inch below the lid of the jar. Make sure the jar’s lid is not covered by water — the water could leak in and ruin your oil!
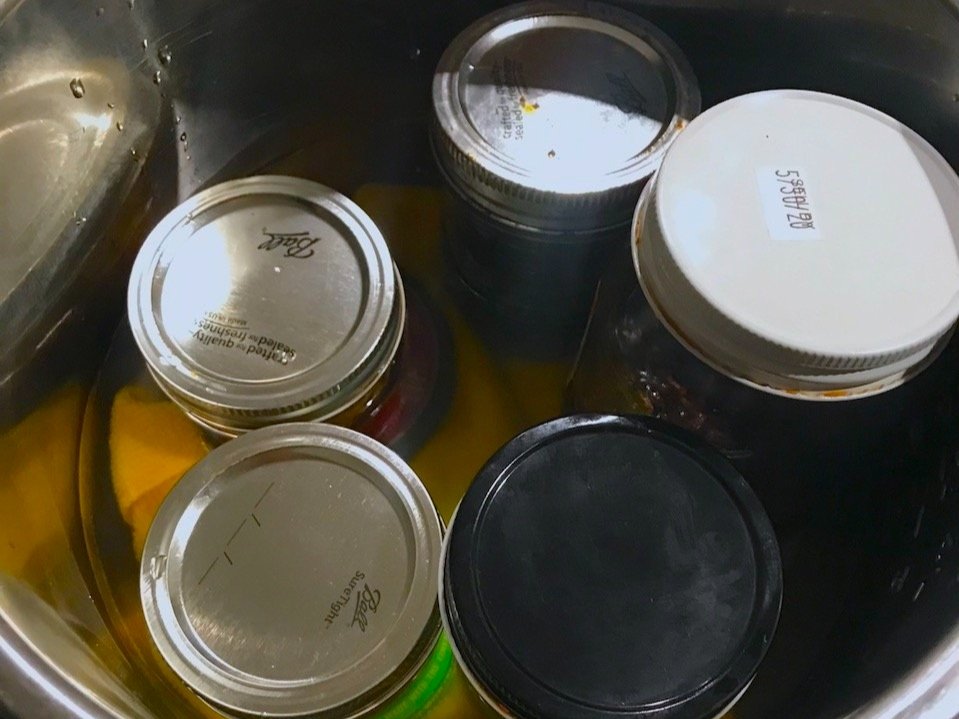
Step 4. Set your slow cooker to a low temperature, preferably between 140˚F-170˚F. Depending on your slow cooker, this might be the “keep warm” setting, or the lowest slow cook setting. Make sure the water does not boil, as too high of a temperature may damage your herbs. Let the oil infuse for 6-8 hours.
Step 5. After it is done infusing, remove your jar from the slow cooker. Once it is cool to the touch, filter it through a cheesecloth or a coffee filter to remove the leaf pieces (you can discard these). Your fragrance oil is now ready for candles!
Notes:
These instructions make about 3 ounces of CA bay oil, but you can easily scale up the quantity by using more and/or larger jars.
Because of the water content from the fresh bay leaves, this oil is not shelf stable, so I recommend storing it in the refrigerator.
You can also use this process with fragrant plants other than CA bay laurel, but you may need to adjust for different levels of potency by adding more or less plant matter to your oil.

Part 2: Making the Candles
You will need:
Fragrance oil from part 1. You can also buy pre-made fragrance oils online or from a craft supply store — make sure to check that they work for candles
Glass jars — can be any size, as long as they are heat safe
Candle wicks with tabs
Soy wax flakes
Hot glue gun (with glue)
Drinking straw made of any rigid material
Medium saucepan
Small heat proof pitcher
Clothespin or plastic clip
Scissors

Step 1. Measure out the soy wax flakes. There are several ways to do this, but I’ve found the simplest to be filling your candle jar with wax flakes to the level you’d like the finished candle to reach, then doubling the amount (because the wax will shrink as it melts). Add the wax to your heatproof pitcher.
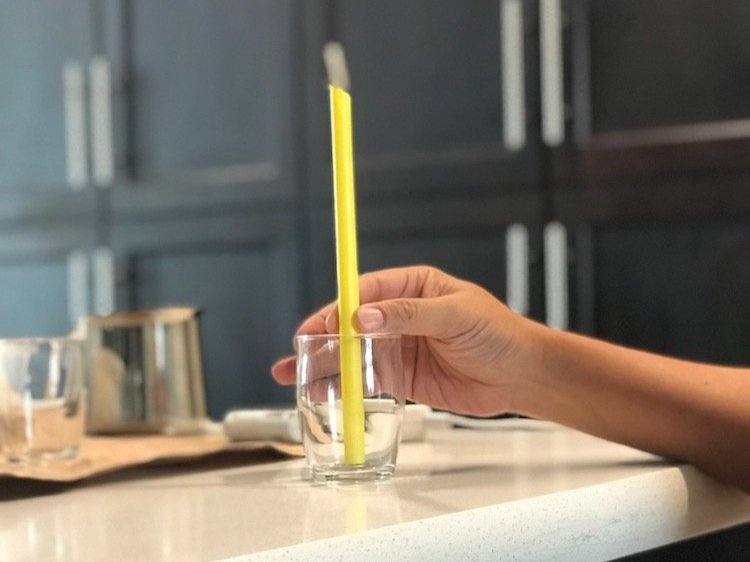
Step 2. Once the jars are empty, insert the wicks. Depending on the brand, your wicks may already have a sticker on the tab that will attach to your candle jar, but if not, you can also use a drop of hot glue. You can use a straw to press down on and position the wick. Use your clip or clothespin to keep the wick centered in the jar.
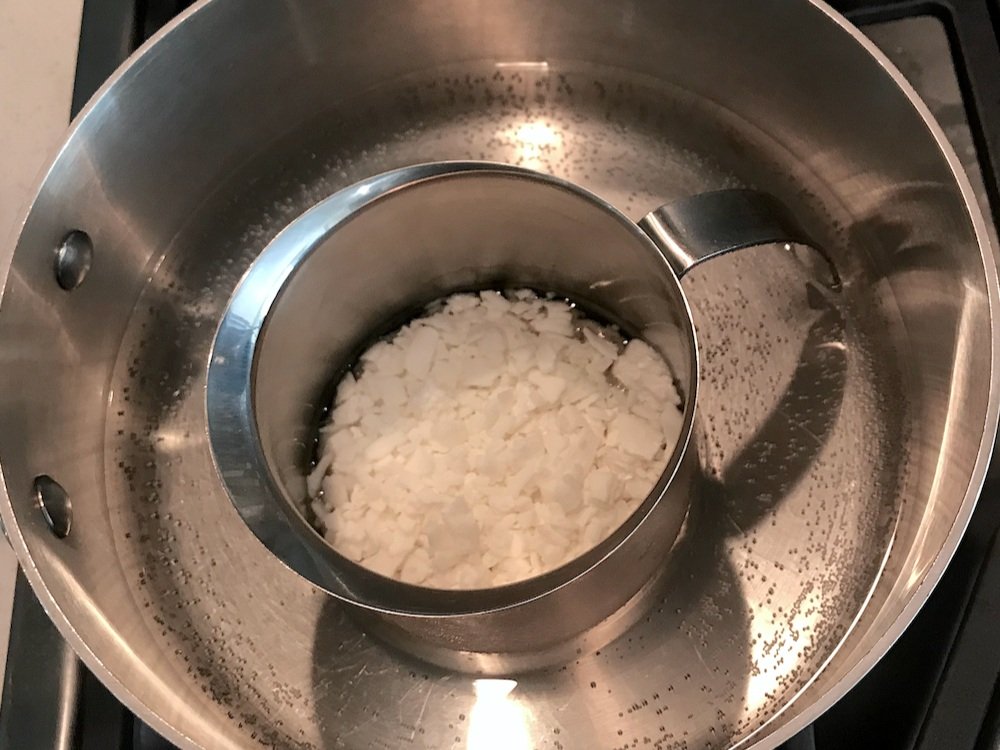
Step 3. Use a double boiler to melt your wax. Fill your saucepan halfway with water and bring to a simmer, then add your heatproof pitcher with the soy wax flakes.
Step 4. When the wax is completely melted, add your fragrance oil. The potency of homemade fragrance oils can vary, so if you are using your own fragrance oil, you may need to experiment a little to find the perfect amount. Stir in your fragrance oil one teaspoon at a time until you are happy with how the wax smells. If you are using a store bought fragrance oil, follow the directions on the package — most oils use a ratio of one ounce of oil for each pound of wax.

Step 5. Pour the wax into your candle containers, avoiding the wicks and wick holders. Check that there are no air bubbles and that the surface of the wax is level, and then leave to cool for at least 24 hours.

Step 6. Once your candles are fully hardened, you can trim your wick to about ¼ inch, and they are ready for you to light!


You now have candles with a unique connection to your local ecosystem for you to light and enjoy!
By Annie Zhang, Summer Naturalist Intern 2022
